
Checkout Filters in Advance Steel Multiuser
Background
I had a customer who was working on a large multi-user model with a lot of objects. They had assigned the objects different groups in Project Explorer. The reason for that was so that they could check out just a conveyor without having to select every single object in the conveyor individually. However, there was a problem with Groups.
The Issue
The problem was that the first user to check out any group ended up locking ALL the remaining groups for all the remaining users. That kind of defeats the purpose of working in a multi user environment.
The Solution
To control the checkout operation over a large model it is recommended to use the command Check out by filter.
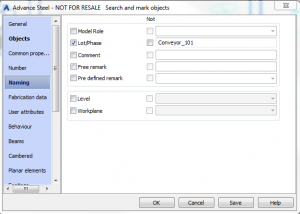
These commands are equivalent to the normal Check Out command, but instead of asking you to select objects from the model, they pop up a Search filter dialog where you can set parameter/s to identify and check out a group of related objects. Selection picking of objects is not required to complete the checkout.
So, the process is to firstly set and then use a searchable parameter on the different groups of objects in your model. A suggestion would be Lot/Phase.
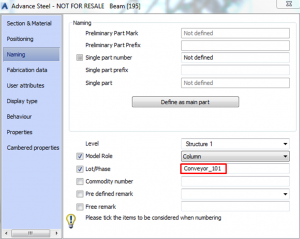
Setting the Lot/Phase
So the first step is to set the Lot / Phase value for a group of objects in the model. You would set it for each conveyor, each screen, and each structure etc.
NOTE: This parameter can be set in the master model, or by people working on a group of objects, in client-mode.
Perform the Checkout by Filter
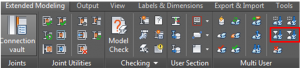
So once the Lot/Phase is set for your design elements you can check out using one of the Checkout by Filter options. There are two different buttons to choose from:
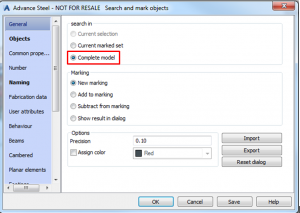
So let’s have a look at the settings that apply to either command, and then explain the differences between the two buttons. There are too many settings and options on the dialog to go through in this blog, but obviously they allow you to narrow down on the exact objects you want to have checked out. I am limiting our discussion to 3 sections of the dialog:
- Firstly, General Settings. I have set the dialog to get objects from the entire model.
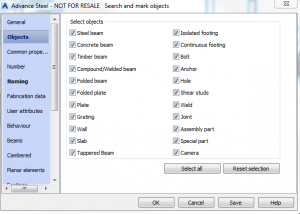
2. Then you select the Object Types you want to work on. Narrow this down as required.
3. Finally, set the Lot/Phase area to be working within.
So that’s it. Having checked out the objects, you work on them, then check them back into the Master Model. The check-in process is the same as you would normally use.
Important Notes
- If you need to work inside the Master Model, to set parameters for your group objects as an example, make sure that ALL the objects are checked in. If any of the objects inside the master model are checked out by a person and you modify the object, assigning the Lot/Phase for example, the connection to that client file is lost!
- As discussed earlier there are two different buttons to perform a Checkout by Filter. So what are the differences between those buttons?
Checkout by Filter – Complete
When you run this command you will notice that more objects are checked out then the ones you selected. The issue is that object/s can be Checked Out complete by only one person. The person who has checked them out can change anything about the checked out elements, eg beam size or type. But no-one else can. You will notice that you can’t adjust any of the elements that didn’t match the filters, even though they are all checked out to you. So in general this option won’t work for you except to make changes to the beam sizes and lengths.
Checkout by Filter – Partial
If you use the Checkout by Filter – Partial command it allows you to cut/cope/drill the objects, but it doesn’t allow you to modify the geometry (size, length, attributes). So this is generally the option you would choose. Each person checks out elements from a particular Lot/Phase and works on just those objects.
