
Revit MEP 2018 – Hydronic Systems are go!
Hydronic Systems: The (Revit) history:
Hydronic systems are used in a variety of buildings for cooling and heating. Data-Centres are a big user of these types of systems as they are closed loops as they provide a highly targeted cooling load inside a large building. Up into the 2018 release of Revit, the software had not understood the closed nature of the system as there has always been an assumption that any logical hydraulic system comprises a source of pressure (tank, pump) and conduits (pipe) and fittings and then terminations than let the hydraulic fluid out at a given rate (taps, WC’s etc).
In 2018 we now see a new type of calculation that allows Revit to correctly calculate pressure drop in a Hydronic system based on the size and material in the pipe and losses from other sources over the loop that the fluid passes through.
How to use Hydronic calculations:
There are 2 basic things to keep in mind when you want to examine the performance of a Hyronic system in Revit.
1 – You need to make sure the logical system is totally closed. That is a given in all systems in Revit of course. You can use the “show disconnects” feature to identify any breaks in the connections on the system.

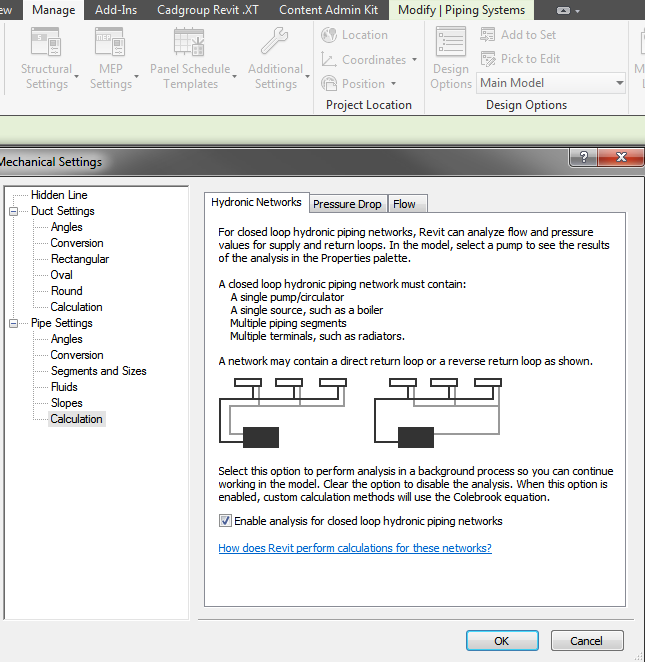
2. You need to make sure that you turn Hydronic Calculations ON.
To do this go to the Manage Tab >MEP Settings > Mechanical Settings and then go to the Pipe Settings: Calculation tab at the very bottom of the dialogue. And that’s it! But once you’ve checked the calculations, it is advisable to turn them off during general use as it can slow down Revit in large sized projects.
So we can now see the pressure loss, flow rates, pressure figures and the total volume of the fluid in the system.
Have fun!
