
How to prevent users from over-extending a parameter in Revit (“When good Revit Families go bad”)
How to prevent users from over-extending a parameter in Revit (“When good Revit Families go bad ;)”)
Written on November 9, 2017. Posted in Knowledge Base, Architecture, BIM, Construction, Engineering, Tech Tips.
One of the things that you might have seen in your Revit travels is when someone is manipulating some dimensions on the Family and you are greeted with a message “Can’t make type “XXXXX”” and then, if you respond with a “yes”, your Family promptly disappears, without even so much as a good bye. It can be a pain and it can be off putting for newer users.
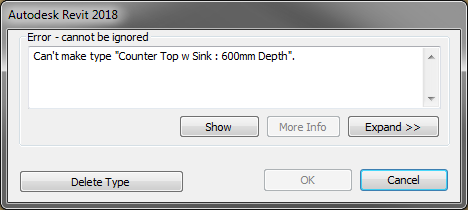
So what happened? Well one way to explain it is that Revit cannot have any object that is a negative value in length. In the example given, the “Counter Top w Sink: 600mm Depth” Family which is one that ships with Metric versions of Revit, there is a void on the top of the bench that represents the opening for a sink. If you drag the end of the opening for the sink over onto the other end, Revit asks you if you want to proceed and if you say “OK”, the Family promptly calls it a night, or day or whatever and checks out and your Family disappears.
So with no further ado, here is how you can stop it.
In the example below, I’ve created a Door Family that allows you to enter the angle of the door swing in the project. In this case I’ve chosen to use an instance parameter so that every door can have a unique door swing but you can also use a type parameter too.
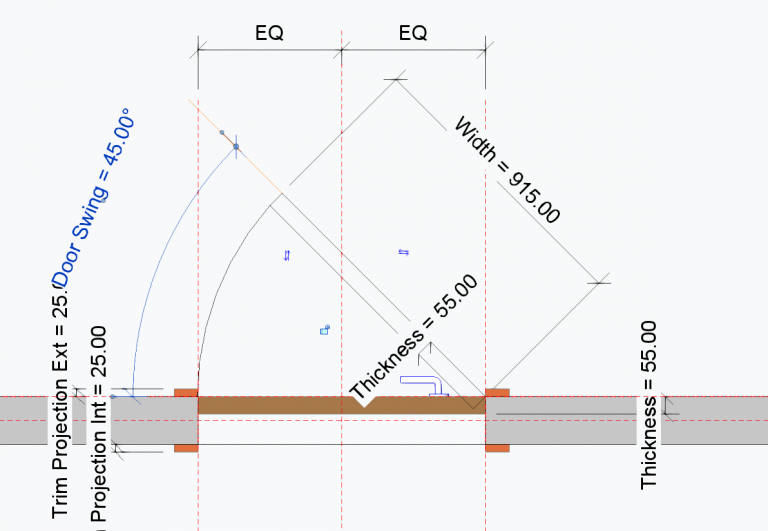
So we have a parameter already called Door Swing. This Parameter is directly controlling the angle that the symbolic lines are at the show up in the plan view to represent the door swing. At this point, the user can see the Parameter in the Properties Window when select the Door (as it’s an Instance Parameter). If they then put in a value that Revit is happy with then and all is good, until, they enter something like “0” or “-20” and then Revit asks the “question” and the user has to cancel or hits “OK” and it all ends in tears So firstly, let’s have a look at how to stop it going lower than 0 degrees first and then once we’ve worked out how to do that, we’ll get really fancy and see how to stop it from going higher than 90 degrees.
The first step that we need to do is to create an additional parameter that will become the parameter that the user can manipulate directly in the project. Let’s call this “Desired Door Angle”.
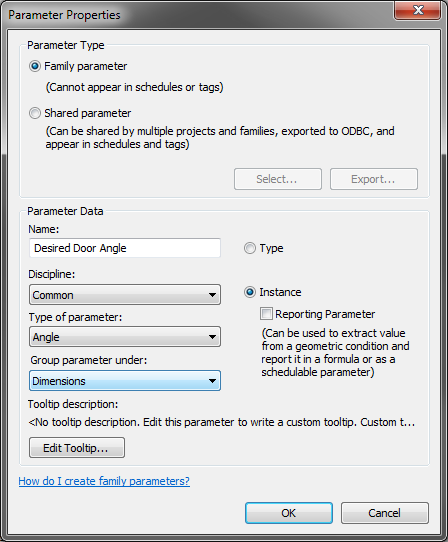
Here is the new Parameter in the Family.

We will now type an “IF” formula next to Door Swing that creates a test. It will examine the value that the user enters into the Desired Door Angle parameter (inside the Project environment) and will apply an “IF” test to it. If the test returns false then this parameter accepts the value in the first parameter and passes it through to the Door Swing Parameter untouched.
If the test is true (that is, the user input goes outside of the acceptable value that we specify) then the Door Swing parameter reverts to a predetermined value so that no harm is done.
The syntax of the Formula will be:
if(Desired Door Angle < 1°, 1°, Desired Door Angle) *Note that we don’t have to enter the degrees symbols or the spaces in the formula as Revit adds that for us. In reality we can just type if(Desired Door Angle<1,1,Desired Door Angle).
In plain language you could write it as this “If the value entered for Desired Door Angle is less than 1 then make Door Swing =1 otherwise if this is not the case (i.e. it’s more than 1) then make Door Swing equal Desired Door Angle. It will look like this:
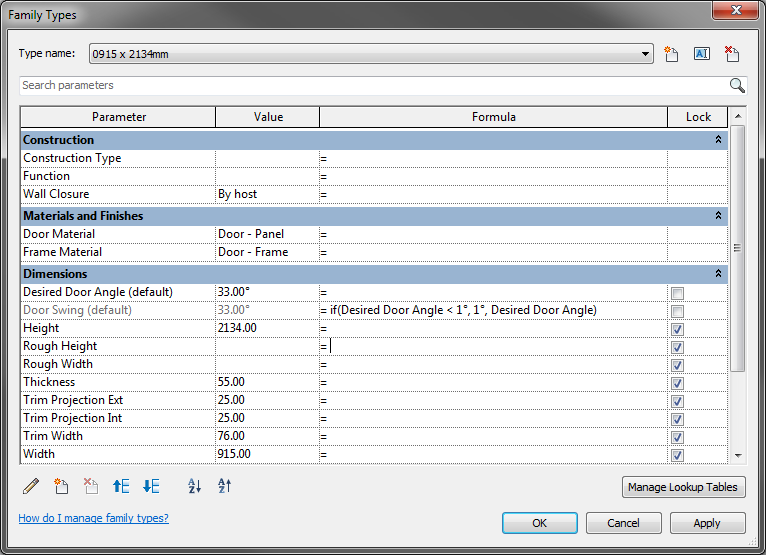
You will note that the value for Door Swing is greyed out. That means it cannot be directly controlled by the user in the Project and instead they can only manipulate the Desired Door Angle. Have a bit of a play in the Family editor and place the Family in the Project to see this in action.
Since we are on a roll now, let’s include a limiter that stops the user from entering a value of more than 90 degrees right? To do that we modify the IF statement by adding a nested IF statement that then tests the Desired Door Angle to see if it is more than 90 degrees and if it is, forces it to 90 degrees. Let’s modify the formula that we just entered above to:
if(Desired Door Angle > 90°, 90°, if(Desired Door Angle < 1°, 1°, Desired Door Angle)) *Note: The placement of the parenthesises is important.
It running 2 tests here and will only pass the value for Desired Door Angle if it is 1 degree or more, or it is less than 90 degrees.

You can test the Family and see that the Door Swing is not locked between the 2 values that we assigned.

Some food for thought:
This will of course work for length parameters so if the example of the Benchtop, we would be limiting the length of the Void to a positive value and perhaps limiting its length to some logical maximum.
We could nest more IF statements if we wanted to make the value jump between different ranges.
You can also make “AND” statements in Revit. So that would apply 2 or more tests and only allow a value to be passed through if BOTH the values are within the bounds of the test.
I hope that this example will give you an insight into how to create these types of limits into Revit Families. And as always, have fun!
